Before I share my free pattern with you, I would like to share Granny A Day 329!
It's this rather lovely pattern from the Edie Eckman book that I mentioned yesterday.
The pattern reminds me of the "twirly's" that you get on the end of a stick that twirl when the wind blows
Now for the free pattern which I wrote today, so I though I would give you all an early Christmas Present.
Crochet Hair Bow or Bow Brooch
Using DK wool / yarn and a 4mm hook
Tension is not important
For the Bow body
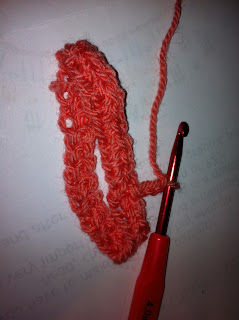
Chain 30
Oops I didn't notice that "holey" one!!
Join with a slip stitch into the first chain made to form a
loop – take care not to twist the chain.
Row 1: Chain 1 &
Double Crochet in each stitch to end, then join with a slip stich into the
chain 1
Row 2: Chain 3 &
Treble Crochet in each stitch to end, then join with a slip stitch into the 3rd
chain of the chain 3
Row 3: Chain 3 &
Treble Crochet in each stitch to end. Join with a slip stitch into the 3rd
chain of the chain 3.
Row 4: Chain 1 &
Double Crochet to end & join with a slip stitch into the chain 1.
At this stage it's a good idea to give a little "tug" to the foundation chain at either end to pull the body of the bow into shape.
DO NOT FASTEN OFF!!
Now for the Middle bit
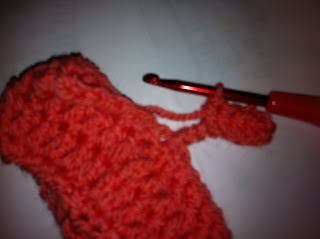
Now chain 8
&
then Half Treble crochet into the 3rd
chain from hook. Half Treble Crochet to end of the chain and then slip stitch
into the body of the bow to “anchor”
Htr's down the chain to the body of the bow
"Anchoring" the middle with a slip stitch to secure
Flatten the body of the bow so that you have 2 layers lying flat, with the "middle" bit in the middle.
Now wrap the “Middle bit” around the back of the bow body (so under both layers) and insert the hook into the end of the middle bit – try to catch
two strands with your hook
& slip stitch, pulling tight.
Remember to pull tight before fastening off
Fasten off and darn in the end.
Now pull the bow to shape & attach either a hair clip or
a brooch back to the bow!
Ta - Dah
Hope you like it.
Please let me know if you have any problems


This is so easy to make and can be used for all sorts of projects, I love it.
ReplyDeleteThanks Heather I hope you enjoy making them and please feel free to link to my blog so that this pattern can be shared! Ali
ReplyDelete