"When you give a gift made with love,
It turns it into something priceless."

Get Hooked Website

My NEW LOOK Website Get Hooked on Crochet is here

Online Crochet Course

Learn to Crochet ONLINE
All 3 courses available in UK Crochet Terminology -Learn to Crochet from the comfort of your own home when YOU have some spare time, whatever time of day! The course never closes so you can return as often as you like, as many times as you like + you can add questions & photo's & have me as your virtual Crochet Teacher !

Followers

Tuesday 27 April 2010

Still Hooked!!

Just in case you were wondering, I am still crocheting away!


I have now completed my Mother In Laws hat a scarf set


And I am very pleased with the results as I had to ad lib on my hat, so had to do the same again, which of course was more difficult 2nd time around!!

I have also joined another row of 10 crochet squares to the blanket


It now measures 10 squares by 11 squares!!

It's getting harder and harder to take photo's so this is the best I could do due to it's size.


Friday 16 April 2010

MIL's hat & scarf project

 As previously mentioned, my lovely mother in law has asked for me to crochet her a hat like mine, so I have done that and now I have started on a matching scarf, which she didn't ask for, but when I offered she sounded thrilled!  The wool arrived from EbaY, but I started on the stock I had to hand, so I could get started straight away.  The pictures here are off my hat and scarf, as a reminder for you, but when this new set is finished I will take more pictures.   The hardest thing was to get the hat right as like on the 1st one, I had to adapt the pattern to fit my head. Fortunately MIL's head is the same size so I got a good fit.

Friday 9 April 2010

Other things & my first order.....

Yesterday we, my husband & I that is, went to a pub called The Chequers,  Rowhook in West Sussex, to meet his Mum and her man (a very long term partner) for lunch.  It was a lovely day and the roads were clear, so we whizzed down there in double quick time in his sports car!!

http://www.thechequersrowhook.com/


The food was delicious and they cater for a gluten free diet without the blink of an eye, which makes a nice change!


I have also had my first order - my lovely mother in law has ordered a hat - the same as the one I made for myself (which I took down for her to try on) and in the same colours too!  I said that I would make her a matching scarf too & I have already ordered the wool from EbaY as I found it on there cheaper than the wool shop sell it for.


Before this lovely mid day luncheon, I had an appointment at the hospital to have my toe stitches out and this is what my big toe now looks like now.  In 2 weeks time I have to gently massage the scar and in 8 weeks time I have to go back for a final check up.
I was told to go about as normal, so in my head I was thinking "oh good I can go and plant potatoes at the allotment" but in reality, it's all still a little tender and not as easy to walk, so I will go the allotment but just to take down some kitchen scraps and water the greenhouse.  I don't want to rush things!


When I got home I was greated by mountain of post, one of which was this lovely "Get Well Soon" card from the Brownies...
How lovely of them to do that for me.  I will treasure it forever!

Wednesday 7 April 2010

Finishing Touches


Oops it's upside down, anyway, the important thing is that you can see how I have finished the back of this top.  This is where you were supposed to put some buttons.
Can you see the "flap" or overlay that I mentioned on my last post?  That's the bit I will miss out on next time.

p.s. I managed a trip to the Allotment Greenhouse yesterday so please see http://www.alithefrog.blogspot.com/ for pictures!

Tuesday 6 April 2010

Summer Breeze Top is finished!


Yes, it's finally completed & I am pleased with how it's turned out.  There are a few things I would do differently next time (yes I will be making another one) 

1. I will not be making the "band" as big - I measured around the middle of my boobs and should have done the average of that bit and my body.  Once sown together, the back "hung" so a plan of action was needed as I could not unpick the whole lot, so what I did was to gather the front from armpit to armpit.

2. I will make the straps 2 or 3 chains thicker but not as thick as the pattern suggested (14)  I made 7 chains but 10 would have been better.

3. I will make the strap length smaller as I followed what the pattern suggested and painstakingly had to unpick them both and reduce the length and stitch them back!  So next time it will be 14 inches.

4. I will not be doing the suggested back flap again.  Can't see the point, but I have done it on this one.  I suppose you could make it into a "feature" as they suggest putting buttons down this and I might make some small flowers and put them down this bit, but I am not sure yet.

 I decided to add some crochet flowers.....
....Instead of the suggested buttons.

Monday 5 April 2010

Sea Breeze Crochet Top Progress

It was a better day than the weather man predicted, so it was definately dog walking weather.  I also felt up to having a bit of fresh air, so I hobbled out the front of the house, whilst hubby & dogs used the tradesmans entrance!!  We are lucky to have a very large park 2 minutes walk around the back of the house and that in turn leads onto greenbelt and small holdings so we can really get a good walk in.  However due to my disposition and Perdita's pulled muscle, we just took the path up to the old hospital and back.


Once home, I continued to crochet the Sea Breeze top.  As you can see here, this is the back view.  You can probably just make out the pin at the top of the overhang??
Well I tried it on yesterday, and it was almost a perfect fit.  It was a little large across the back, so I unpicked the previously sown up edge and re stitched it.  It was a bit of a disaster to start of with as I had neatly sown in the ends, and then couldn't find them so I was worried that I would be cutting the stitches!!  But I got there in the end.  I have left a long "tail" of wool which I have wound around a safety pin so it can be (a) tried on again and (b) easily adjusted later on.  A lesson learnt - don't sow ends in until you have had a fitting!!


This is the front view.  The "bodice" part now measures approximately 7 inches, so just another 7 or 8 to go!  Then its the straps left + buttons to decorate.

That will probably be finished today then.

What colour should I do next????

Sunday 4 April 2010

Easter Saturday's New Project......

I decided to go for a new project this weekend, as I can easily pick up on the Granny Square Blanket


And the Vintage stripy blanket, as and when I feel like I need a change!


So I have started on the Free Pattern that I received from Lion Brand Yarn via email, the SEA BREEZE TOP


As you can see, I have chosen to do this in Pampas, which is a soft olive green colour and I have used the same wool as I use for the Granny Square Blanket as the pattern required 50% cotton and 50% acrylic.  It's a lovely wool to work with and I managed to get 6 balls of this colour very cheaply (£3.20) on ebay recently.  It's normally £1.99 per ball!

I am really pleased with my neat edging.  I think I may have got it after all.  I have been making the turning chain, in this case 2 chains, as the rest of the row is working in half treble crochets ( the pattern says half double crochet, which is US stitching, so I converted it to UK), looser than I have been doing recently, and this has helped me to keep the constant 26 chains across at all times.

I read that for my size I had to continue to work until the piece (this is the band across the bust that I am working on here by the way) measured 37 inches, so I had one of those lightbulb moments, ran upstairs - well ok I hobbled quickly - and got my tape measure out from my sewing box - I measured around my bust and soon realised that an extra few inches wouldn't go amiss!Wow this is going to be a made to measure top!!


When you got to your required length you have to:

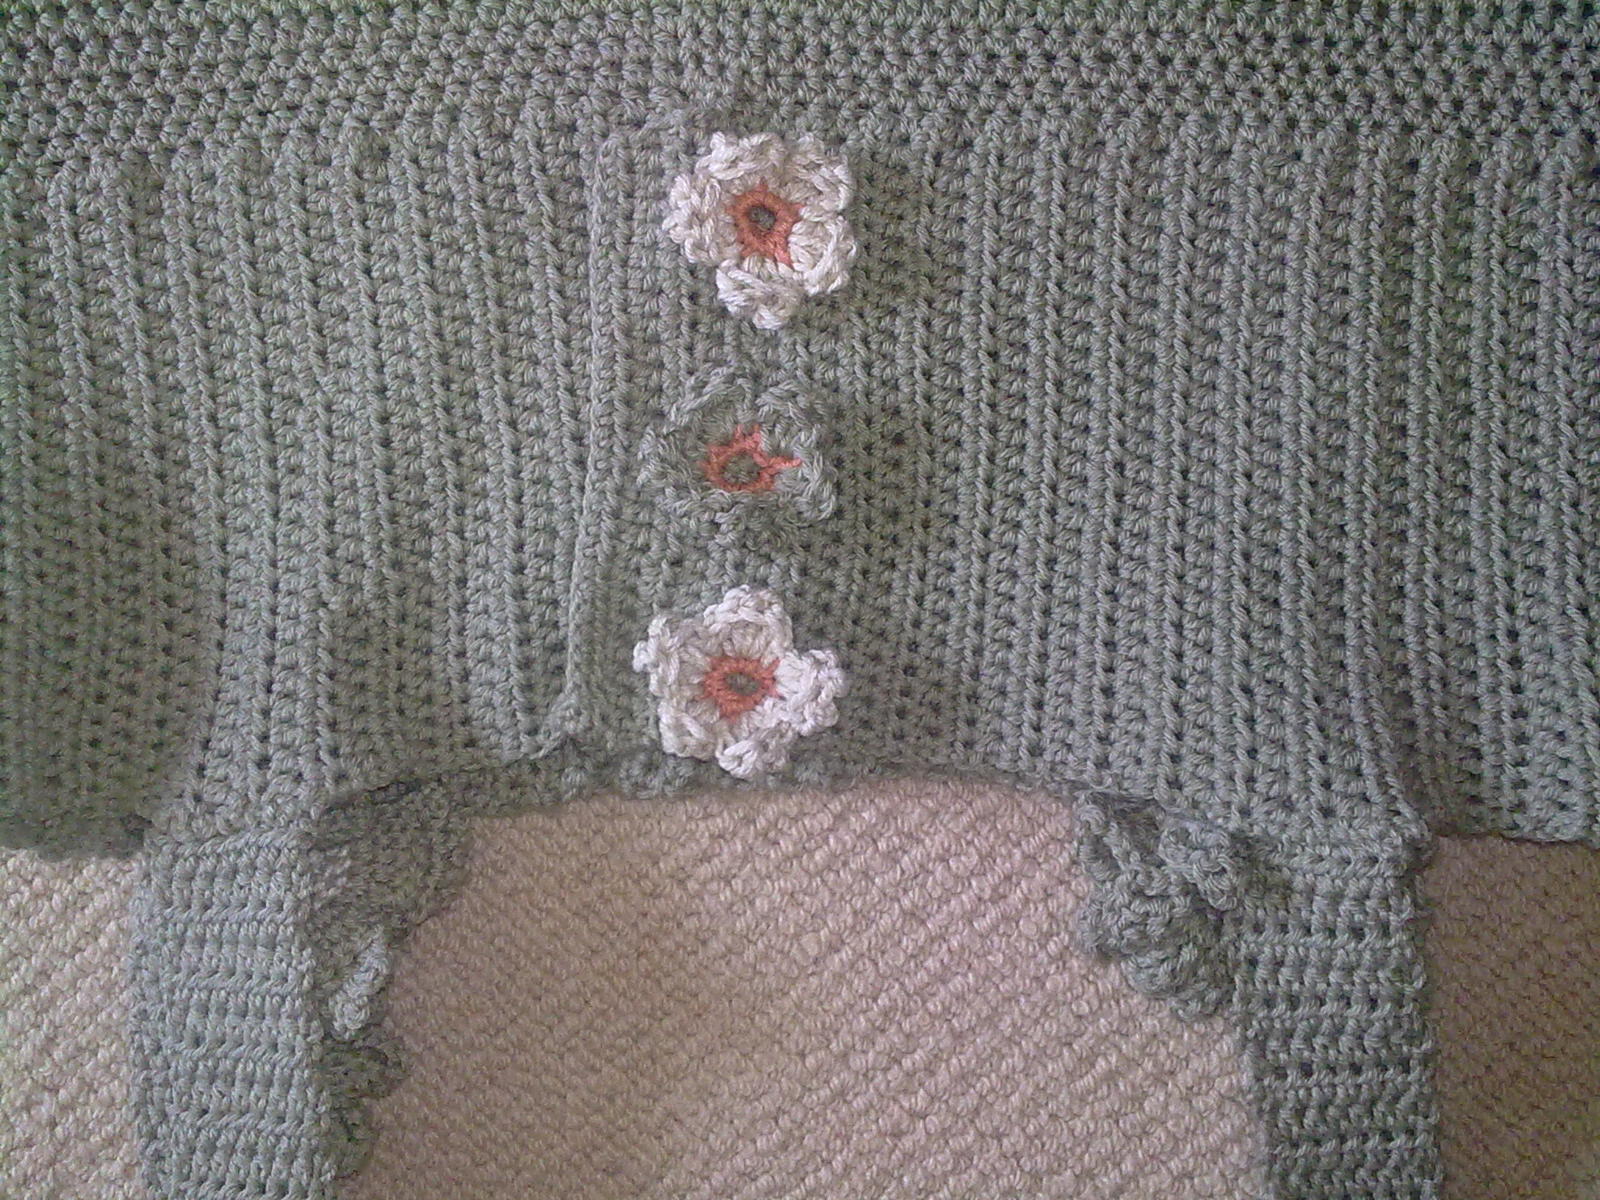
Overlap the short ends of Band by 1 in. (2.5 cm) and pin to form center back. Sew along one long edge of the overlapped section to secure the 2 layers together along that edge only. Bodice sts will be worked along this joined edge. Overlapped section is center back.


I think I did it right!!

Then you have to:

Ch 2, work 122 (138, 154, 170, 186) hdc evenly spaced around lower edge of Band; join with sl st in first hdc.


This did take a little while to work out, but then it clicked - I had to start the bodice off from the Band and not as a separate item!!  So I joined the yarn at one edge (neat edge hehehehe) chained two, and added about 136 half treble crochets.  I did loose count a little after 120 but I had a good idea that I was on the right amount or thereabouts.


So this is the first row being added....


And this is the result at the end of row 4.  I now have to change to the bigger needle size and work until the bodice measures about 14 to 15 inches - so a job for a rainy wet Easter Sunday then!!


Link to the Free Pattern - Lion Brand Sea Breeze Top

Saturday 3 April 2010

Easter Weekend


Look at that sky!  Hubby had taken me out for a little "country" drive to blow away the cobwebs, but after about 20 minutes, we saw these clouds so headed for home.
This picture is taken not far from home - it would take about 10 minutes to walk here. This area is known as Little Woodcote

So once home, I started back on the granny squares.  I did the Italian Cross, which I did attempt some time ago but gave up, due to lack of concentration probably, and the Primrose, which was very easy to do and very pretty.

 Then my little too good to be true Husband brought my dinner through - Halibut Moroccan style - and it was delicious I can tell you.  The sauce was a sweet chilli sauce and the fish was perfectly cooked.


 After devouring and savouring the delicious food, I continuted to make some more squares -
this one is the granny in a sqaure

And this one started off as a side to side (block) in the middle and then went on to a  round! It needs pinning out.


I then attempted the multi colour bobble block about 3 times.  I kept going wrong, even though I had the right amount of stitches!! I tried, tried and tried again.  Then I gave up!

I then found this block in one colour to do, so I chose Paprika and it worked!! I don't know why I can't do blocks, they always turn out odd shapes, I gain stitches unless I count religiouly, grow sides, loose sides and turn out all oddly shaped.  This one isn't too bad compared to some of them I have done. I think I will stick to the round and round and round ones from now on!

I am very tempted to start this top this weekend, but that would mean 2 projects on the go - should I or shouldn't I???